
How Big Should my Roof Lantern be?
Picking the right size for your Roof Lantern can feel a bit tricky, right? You want it to look good and bring in plenty of light, but you also don’t want it to be too big or too small for your room. It’s all about finding that sweet spot where the Roof Lantern makes your space feel brighter and more open without looking out of place. Let’s talk about how to get it just right for your home.
Key Takeaways
- The size of your Roof Lantern should match your room’s size to look good and work best.
- Think about how much light you really need; more isn’t always better for a Roof Lantern.
- Your roof’s structure is a big deal and affects what size Roof Lantern you can put in.
- Energy efficiency matters, so pick a Roof Lantern that keeps your home cozy.
- Always measure carefully, considering the external kerb size for your Roof Lantern.
Understanding Roof Lantern Proportions
Balancing Room Size with Roof Lantern
Getting the right size for your roof lantern is a big deal. You don’t want it to look like an afterthought, but you also don’t want it to take over the whole room. A good rule of thumb is to aim for the roof lantern to cover about 15-20% of the total roof area. If it’s too small, it might not make much of a difference, and if it’s too big, it can feel a bit much, almost like it’s trying too hard. Think about the flow of the room and how the lantern will fit in with everything else. It’s all about finding that sweet spot where it adds to the space without dominating it.
Optimizing Light for Your Space
When you’re thinking about a roof lantern, a lot of it comes down to light. How much natural light do you actually want in the room? If your space is already pretty bright, a smaller lantern might be enough to just give it that extra little sparkle. But if you’re dealing with a darker room, or you really want to flood the place with sunshine, then a larger lantern is probably what you’re after. It’s not just about making the room brighter, though; it’s also about how the light changes the feel of the space throughout the day. Consider what will be directly under the lantern, like a kitchen island or a dining table, because that’s where the light will really hit.
Considering Overall Roof Coverage
When you’re planning for a roof lantern, you’ve got to think about the whole roof, not just the hole you’re cutting. The lantern needs to sit right on an upstand, which is usually built by your roofer. This upstand is important for proper drainage and making sure everything is weatherproof. You also need to consider the shape of the lantern. While standard rectangular ones are common, you can also get custom-made roof lanterns in different shapes like square or octagonal. The overall coverage of the roof lantern should complement the existing roof structure and not look out of place. It’s a balance between aesthetics and practicality.
- The upstand should typically be at least 150mm high for good rainwater runoff.
- The width of the upstand should be at least 69mm to support the lantern’s base.
- The external kerb size of the lantern is what you’ll measure, not the hole in the roof itself.
Structural Considerations for Your Roof Lantern
When you’re thinking about adding a roof lantern, it’s not just about how it looks or how much light it brings in. You’ve got to think about the bones of your house, specifically the roof. This part is super important because a roof lantern, especially a bigger one, adds weight and changes how your roof handles things. You don’t want to end up with a saggy roof or, even worse, a collapse. So, let’s get into the nitty-gritty of making sure your roof can handle the new addition.
Assessing Existing Roof Structure
Before you even start dreaming about the perfect roof lantern, you need to take a hard look at your current roof. Is it a flat roof? Is it pitched? What kind of materials are holding it up? The existing roof structure dictates the maximum size and weight your roof can safely support. Things like the spacing of your roof joists, the type of timber used, and the overall condition of the roof are all big factors. If your house is older, or if the roof has seen better days, you might need some upgrades before you can even think about a lantern. It’s like trying to put a big engine in a tiny car; the chassis might not be able to handle it. You need to know what you’re working with before you make any big plans. This initial assessment is key to avoiding headaches down the road.
Consulting with Professionals
This isn’t a DIY job, folks. When it comes to structural changes, you absolutely need to bring in the pros. We’re talking about structural engineers and experienced roofers. They’re the ones who can tell you if your roof is up to snuff or if it needs some serious reinforcement. They’ll look at blueprints, inspect the roof in person, and do all the calculations to make sure everything is safe and sound. Don’t try to cut corners here; it’s just not worth the risk. A good professional will:
- Evaluate the current load-bearing capacity of your roof.
- Identify any weak spots or areas that need strengthening.
- Provide recommendations for necessary structural modifications.
- Help you understand the implications for roof terraces and structures.
- Ensure compliance with local building codes and regulations.
It’s easy to get caught up in the excitement of a new home improvement project, but ignoring the underlying structural requirements can lead to significant problems. Think of it as building a strong foundation for any new addition; without it, the whole thing could crumble. Taking the time to consult with experts upfront will save you time, money, and stress in the long run.
Ensuring Load-Bearing Capacity
This is where the rubber meets the road. Once you’ve had your roof assessed, the main goal is to make sure it has enough load-bearing capacity for the new roof lantern. This means the roof needs to be able to support the weight of the lantern itself, plus any additional loads like snow, wind, and even people walking on it for maintenance. Sometimes, this might mean adding extra beams, reinforcing existing joists, or even building a new support frame. For flat roofs, especially, you might need to create a robust upstand that can distribute the weight evenly. It’s all about making sure the forces are properly managed and that your roof can handle the new addition without any strain. This step is non-negotiable for safety and longevity.
Maximizing Natural Light with a Roof Lantern
Determining Light Requirements
When you’re thinking about adding a roof lantern, the first thing to really nail down is how much light you actually need. It’s not just about throwing a big glass box on your roof and hoping for the best. Think about the room’s current light situation. Is it a dark, north-facing space that feels like a cave even at noon? Or is it already pretty bright, and you’re just looking for a little extra sparkle? A good rule of thumb is that a roof lantern should cover about 15-20% of the room’s floor area to provide ample natural light without overdoing it. If your room is already getting a decent amount of sun from windows, a smaller lantern might be all you need to just give it that extra lift. But for those truly dim areas, you’ll want to go bigger to really transform the space. It’s all about finding that sweet spot.
Enhancing Ambiance with a Roof Lantern
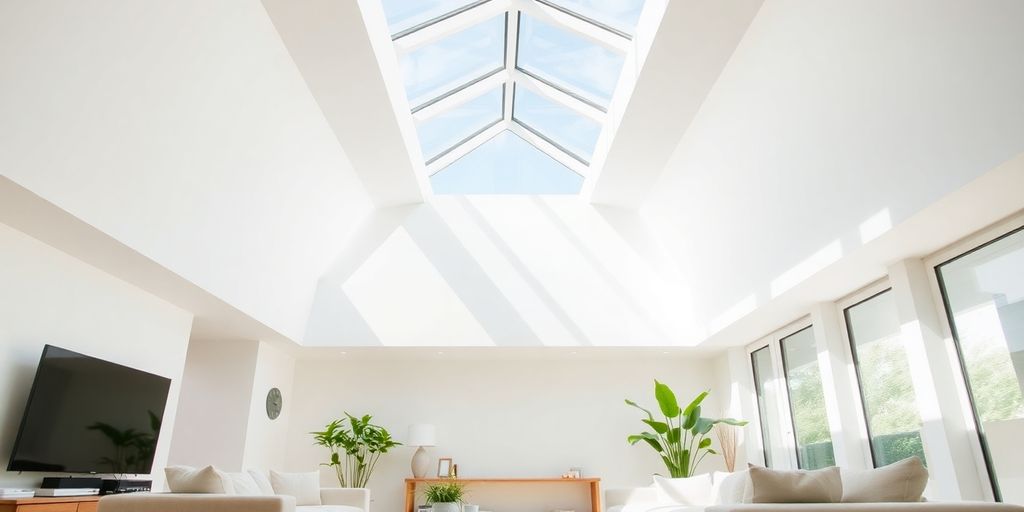
Beyond just making a room brighter, a roof lantern can totally change the feel of a space. It’s not just about lumens; it’s about creating an atmosphere. Imagine a kitchen that feels open and airy, or a living room that’s bathed in soft, natural light all day long. That’s the power of a well-placed roof lantern. They can make a room feel much larger than it actually is, drawing your eye upwards and creating a sense of height and openness. It’s like bringing the outside in, but without the bugs or the weather. This can be especially impactful in rooms where you spend a lot of time, like a kitchen or a family room, making them more inviting and comfortable. For more ideas on how to brighten your home, check out these natural light tips.
Avoiding Over-Illumination
Now, while more light often sounds better, there’s such a thing as too much of a good thing. Over-illumination can be a real problem. Think about glare on screens, or rooms that get uncomfortably hot in the summer. You don’t want your beautiful new roof lantern to turn your living space into a greenhouse or a blinding spotlight. Here are some things to consider to avoid over-illumination:
- Room Orientation: South-facing rooms get a lot of direct sunlight, so a smaller lantern or one with specialized glazing might be better.
- Glazing Type: Different types of glass can block varying amounts of UV rays and heat. Low-emissivity (Low-E) glass is a popular choice for balancing light and thermal performance.
- Shading Options: Consider internal or external blinds. They can be a lifesaver on super sunny days, giving you control over the light and heat.
- Room Function: A home office might need less intense light than a conservatory. Tailor the lantern size and features to the room’s purpose.
It’s easy to get carried away with the idea of a massive roof lantern, but a thoughtful approach to light requirements and potential downsides will lead to a much more satisfying outcome. Balancing the desire for brightness with practical considerations like heat gain and glare is key to creating a truly comfortable and inviting space.
Energy Efficiency and Your Roof Lantern
Minimizing Heat Loss with a Roof Lantern
When you’re thinking about adding a roof lantern, one of the big things to consider is how it’s going to affect your home’s energy use. It’s not just about letting light in; it’s also about keeping the heat where it belongs. A poorly chosen or installed roof lantern can actually make your energy bills go up, which is the last thing anyone wants. The goal is to get all that lovely natural light without turning your home into a drafty mess in winter or an oven in summer.You want a good balance. Think about the materials used in the frame and the glass itself. These things really matter for keeping your home comfortable and your energy costs down. It’s all about making smart choices upfront.
Selecting the Right Glazing
Choosing the right glass for your roof lantern is super important for energy efficiency. It’s not just any old glass; there are different types, and they all perform differently. You’ve got options like double glazing, triple glazing, and even specialized coatings that can reflect heat. For example, low-emissivity (low-e) coatings are a popular choice because they help keep heat inside during colder months and reflect solar heat away in warmer months. This means your heating and cooling systems don’t have to work as hard. Also, consider the argon gas fill between the panes; it’s a better insulator than just air. The right glazing can make a huge difference in how well your roof lantern performs.
Understanding Thermal Performance
Thermal performance basically tells you how good your roof lantern is at insulating. The main way to measure this is with something called a U-value. A lower U-value means better insulation, which is what you want. It indicates how much heat is lost through a material. So, if you see a roof lantern with a U-value of, say, 1.2 W/m²K, that’s generally better than one with a U-value of 1.5 W/m²K. It’s a bit technical, but it’s a key number to look at when you’re comparing different options. Don’t just go for the cheapest one; sometimes, spending a little more upfront on better thermal performance can save you a lot of money on energy bills in the long run. It’s an investment in your home’s comfort and your wallet.
When you’re picking out a roof lantern, it’s easy to get caught up in how it looks or how much light it lets in. But don’t forget about the energy side of things. A well-insulated roof lantern can make your home more comfortable year-round and help you save on heating and cooling costs. It’s a smart move to prioritize energy efficiency from the start.
Popular Roof Lantern Sizes
Standard Dimensions for Roof Lanterns
When you’re looking at roof lanterns, you’ll find a bunch of standard sizes out there. These are usually pretty good for most homes, especially if you’re not building something super custom. A lot of companies make lanterns in common sizes to fit typical room layouts and roof structures. Think about it like buying a standard window; there are sizes that just work for most houses. These standard options can often be more budget-friendly too, since they’re mass-produced. It’s always a good idea to check what’s readily available before you start thinking about something totally unique. You might be surprised at how well a standard size fits your needs.
Bespoke Roof Lantern Options
Sometimes, a standard size just won’t cut it. Maybe your room is an unusual shape, or you have a very specific vision for how much light you want. That’s where bespoke roof lanterns come in. These are custom-made to your exact specifications, meaning you can get pretty much any size or shape you can imagine. This flexibility is great for unique architectural designs or for maximizing light in tricky spaces. Of course, custom usually means a higher price tag and a longer wait time, but for some projects, it’s totally worth it to get that perfect fit and look. If you’re considering a custom lantern, make sure you have very precise measurements.
Choosing the Right Size for Your Needs
Picking the right roof lantern size isn’t just about what fits; it’s about what works best for your space and your goals. Here are some things to think about:
- Room Proportions: A small lantern in a huge room will look lost and won’t provide enough light. Conversely, a giant lantern in a tiny room can feel overwhelming. Aim for a balanced look.
- Light Requirements: How much natural light do you actually want? A larger lantern brings in more light, but too much can cause glare or heat issues. Consider the room’s orientation to the sun.
- Aesthetic Impact: Do you want the lantern to be a subtle feature or a dramatic focal point? The size will play a big role in its visual impact.
- Budget: Larger and custom lanterns generally cost more. Think about what you’re willing to spend on the unit itself and the installation.
It’s not just about filling a hole in the roof. The right size roof lantern can transform a room, making it feel bigger, brighter, and more inviting. Take your time to consider all the angles before making a decision. A well-chosen lantern will add value and enjoyment to your home for years to come. Remember, a small uPVC roof lantern cost can range from £1,500 to £2,500, so plan your budget accordingly.
Atlas Roof Lantern Specifications
Atlas roof lanterns are pretty popular, and for good reason. They’ve got this sleek, modern look, and they’re known for being good at keeping heat in, which is a big deal when you’re trying to save on energy bills. People often pick them when they want to get a lot of light into a room without making the house feel drafty.
Atlas Roof Lantern Standard Sizes
When you’re looking at Atlas roof lanterns, they do have some common sizes that most folks go for. These are usually good if you’re not building something super custom and just need a solid option that fits a typical space. It’s like buying a shirt off the rack – usually, you can find one that fits pretty well.
- 1000mm x 2000mm: This one is often used for smaller spots, like a compact kitchen or a bathroom where you just want a little extra brightness. It’s not going to flood the whole room, but it makes a difference.
- 1500mm x 2500mm: This is a good middle-of-the-road size. It works well in medium-sized rooms, like a dining area, a living room, or even a home office. It brings in a decent amount of light without being too much.
- 2000mm x 4000mm: Now we’re talking about the bigger spaces. If you’ve got a large extension or an open-plan kitchen, this size is going to bring in a ton of light. It really becomes a feature in the room, making a statement.
Atlas Roof Lantern Versatility
One of the cool things about Atlas roof lanterns is how versatile they are. They’re not just for one type of house or one kind of room. You can see them in all sorts of places, from modern new builds to older homes that have been renovated. They just seem to fit in, which is nice. The design is pretty clean, so it doesn’t clash with a lot of different styles. It’s all about getting that natural light in, and these lanterns do a good job of it, no matter the setting.
Choosing the right roof lantern isn’t just about the size; it’s also about how it fits with the overall feel of your home. Atlas lanterns are designed to be pretty adaptable, so they can work in a lot of different situations. They’re built to let in a lot of light while still being energy efficient, which is a big plus for most homeowners.
Atlas Roof Lantern for Large Spaces
If you’ve got a really big room, like a huge open-plan living area or a large extension, Atlas has options that can handle that. They can make a huge difference in how bright and open a large space feels. Sometimes, a single large lantern is better than a bunch of smaller ones because it creates a more unified look and lets in more light without breaking up the ceiling too much. It’s all about making sure the light spreads out evenly and makes the room feel bigger and more inviting.
Measuring for Your Roof Lantern
Getting the right measurements for your roof lantern is super important. It’s not just about picking a size you like; it’s about making sure it fits perfectly and works with your home’s structure. A small mistake here can cause big headaches later on, so taking your time and being precise is key. You want that natural light to flood in, not to have a leaky roof because of a bad fit.
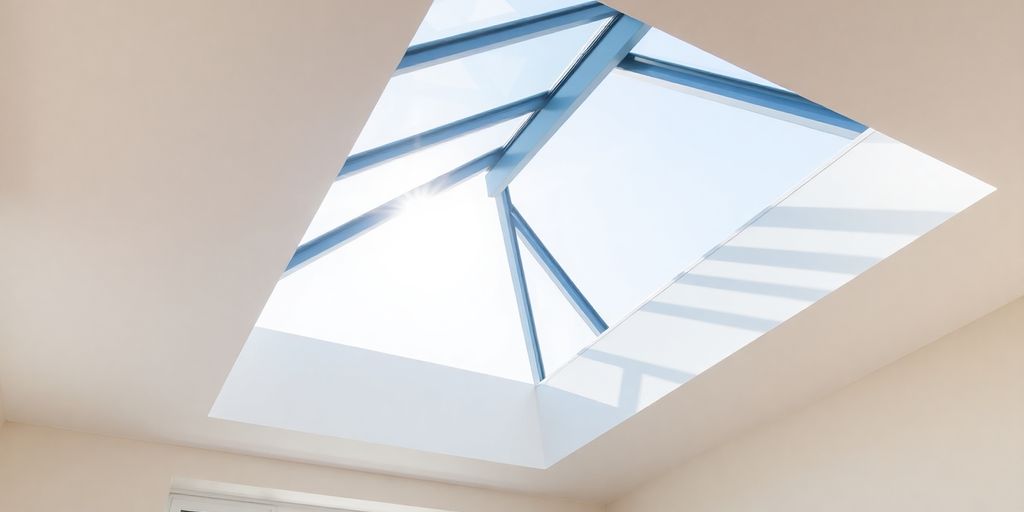
Understanding External Kerb Size
When you’re looking at roof lantern sizes online or in a catalog, the dimensions you see, like “1000mm x 1500mm,” almost always refer to the external kerb size. This isn’t the actual hole in your roof. Instead, it’s the measurement of the timber upstand that the roof lantern will sit on. Think of it as the base. The lantern’s eaves will rest right on top of this upstand, usually with a little bit of overhang to help with weather protection. So, when you’re planning, remember that the listed size is for the platform, not the void.
Building the Upstand for Your Roof Lantern
The upstand is a pretty important part of the whole setup. It’s typically built on-site by your roofer, usually out of wood, and then covered with a weatherproof membrane. This creates a solid, level surface for the lantern. The recommended height for this upstand is around 150mm, and it should be at least 69mm wide to match the base of the lantern’s eaves. Getting these dimensions right is absolutely critical for a secure and watertight installation. Your roofer will make sure it’s all squared away, but it’s good to know what they’re working with.
It’s easy to get caught up in the excitement of a new roof lantern, but don’t rush the measuring process. A well-measured and properly installed lantern will bring years of enjoyment and light, while a rushed job can lead to costly repairs and frustration. Take your time, double-check everything, and if you’re unsure, always get a professional opinion.
Ensuring Proper Rainwater Runoff
One thing you might not think about immediately is rainwater runoff, but it’s a big deal for roof lanterns. Building regulations usually require that the external kerb (that upstand we talked about) sticks up at least 150mm from the roof surface. Why? This height helps ensure that rainwater can properly drain away from the base of the lantern. If the upstand isn’t high enough, water can pool around the edges, which can lead to leaks and damage over time. It’s a small detail, but it makes a huge difference in the long-term performance and durability of your roof lantern. So, when you’re talking to your builder or roofer, make sure they’re aware of this requirement.
Wrapping It Up
So, figuring out the right size for your roof lantern isn’t just a quick guess. You really need to think about your room, how much light you want, and what your roof can actually handle. Get it right, and your space will feel amazing, full of light and looking just perfect. Get it wrong, and well, it might not be quite what you hoped for. Take your time, do a little planning, and you’ll end up with a roof lantern that makes your home shine.
Frequently Asked Questions
How do I pick the right size roof lantern?
The best size for your roof lantern depends on a few things: how big your room is, how much light you want, and the structure of your roof. A good rule of thumb is for the lantern to cover about 15-20% of the roof area in that room. This usually gives you enough light without making the space feel too bright or out of balance.
Can roof lanterns be custom-made?
Yes, roof lanterns can be made to fit almost any size or shape. If standard sizes don’t work for your space, you can often get one custom-made to perfectly match your needs.
Do bigger roof lanterns affect my home’s temperature?
Larger roof lanterns let in more sunlight, which can make a room feel bigger and brighter. However, they can also let out more heat in winter or let in too much heat in summer if they aren’t properly insulated. It’s a trade-off between light and keeping your home comfortable.
How do I measure for a roof lantern?
You’ll need to measure the outside edge of the opening where the lantern will sit on your roof. This is called the ‘external kerb size.’ It’s important to add a little extra to these measurements (like 12mm in length and width) to make sure the lantern has a small overhang for rain to run off properly.
Do I need a professional to check my roof before installing a lantern?
Yes, it’s a really good idea to talk to a structural engineer or an experienced roofer before you install a roof lantern, especially a large one. They can check if your roof can handle the extra weight and make sure everything is safe and sound.
What are the main benefits of adding a roof lantern?
Roof lanterns are great for bringing in natural light and making a room feel more open and airy. They can also help reduce the need for artificial lighting during the day, which might save on electricity bills. Plus, they can add a stylish, modern touch to your home.


Leave a Reply
Want to join the discussion?Feel free to contribute!